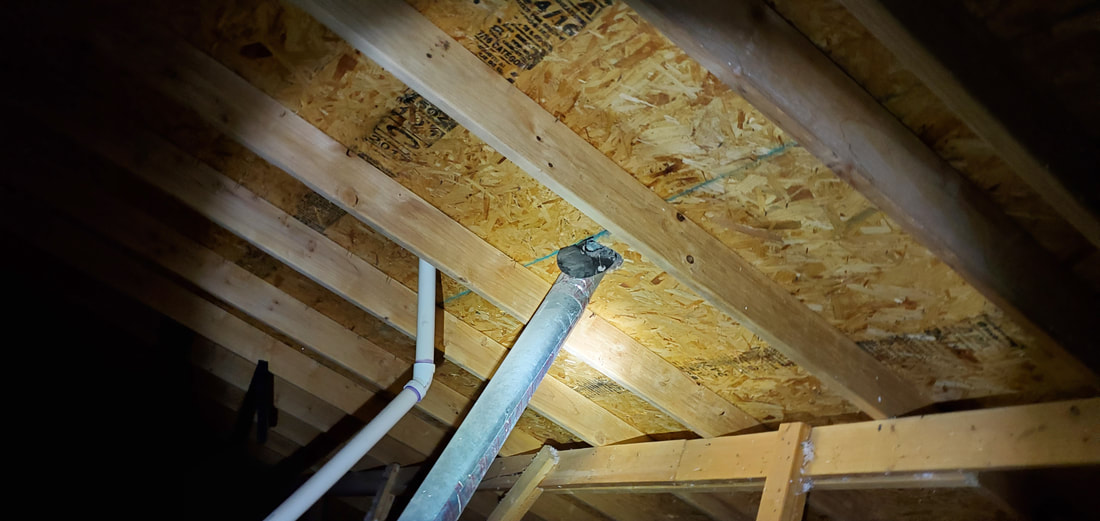
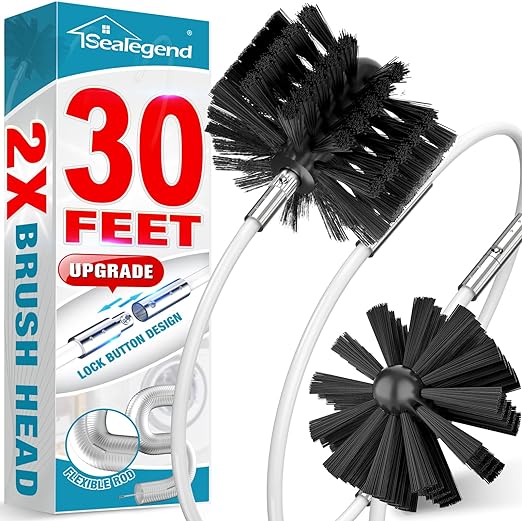
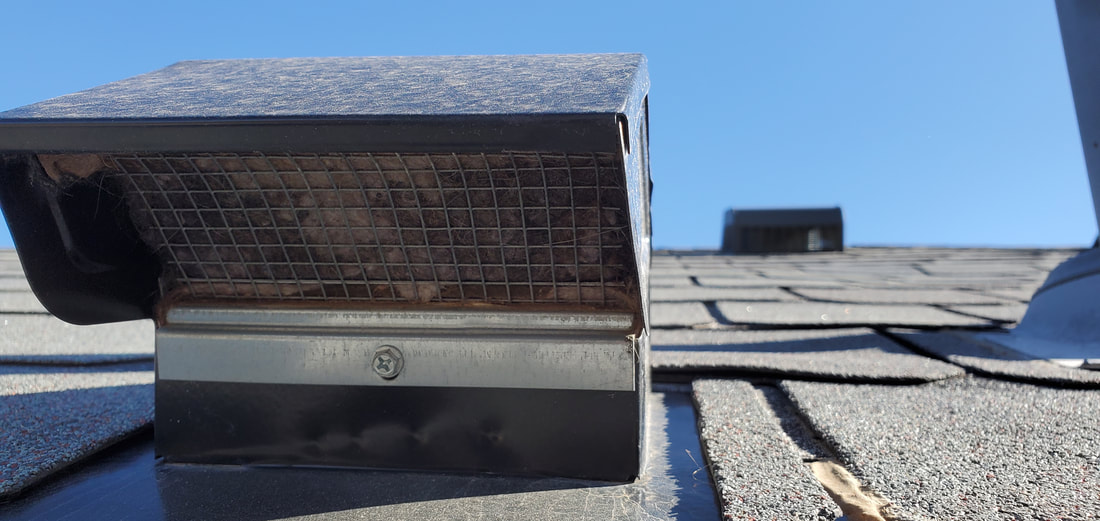
 For the last 50 years or so, it has been common for home builders to install a dryer vent that runs through the wall, upwards through the attic to a vent on the roof. Many folks that deal with homes on a daily basis are not aware of this - in fact, I once inspected for a roofing company owner that did not know this! (I wonder how he had replaced so many vents over the years not knowing at least some were dryer vents? Wouldn't you wonder why those vents had dryer lint residue in them if you were him?) Dryer vents are commonly partially obstructed by lint due to lint managing to bypass the lint trap in your dryer. Because they're obstructed, this reduces the effectiveness of your dryer, and in rare circumstances, can sometimes even result in a fire! Cleaning a dryer vent can sometimes be easy if you are up for it - and of course, these instructions are not repair recommendations - if you don't feel confident completing these steps, hire someone that feels confident doing it right! Be safe! Okay, here are your steps to follow: 1. You may need to order a dryer vent cleaning kit. Some dryers vent to the exterior immediately behind the wall so you may be able to clean the vent with a vacuum. Others vent to the roof, which means the vent is very long and will require some more reach. Know which you'll need before buying! For roof vents, you can sometimes see the duct for the dryer vent running through the attic, and it will look something like the pic above - the silver metal pipe. (Be sure it's a dryer vent duct and not for your water heater or furnace!) I've attached a link to one example of a kit made for longer reaches and it's available on Amazon. a.co/d/bsp18uy This one will work for most of the roof discharging dryer vents I've seen on home inspections but feel free to buy one that you like best. 2. Once you've got your hands on your cleaning kit and understand how to use it, now you can disconnect your dryer from the vent connection on the wall inside your home. 3. Okay, you've already identified where your dryer vents to the exterior. If you need the vent kit to clear from the roof down, safely access the roof and remove the vent cover. This can be challenging with some types of vents so make sure you're ready for what's ahead before diving in! The discharge vent above is completely obstructed by lint because the builder or roofer left the screen in place. The screen should have been removed before anyone ever moved in to this home. This dryer has likely been struggling to dry clothes from day one of use, and as noted before, this also creates a potential for a fire hazard. This type of vent cover is difficult to remove easily without damaging the roof covering materials, so if your vent looks like this, make sure to research how to remove and replace it effectively prior to beginning this task!
4. Once the vent cover is removed, you're ready to use the dryer vent kit cleaner to clear the vent and duct. Follow the manufacturer's instructions on this process. This should create quite a bit of lint in the laundry area, so be ready to clean it up when you're done up here! It might help to have a second set of eyes in the laundry room to tell you when the vent looks like its not dropping out any more lint... 5. Once you've cleared the duct, you can reattach or replace the vent cover. 6. Last, after you've cleaned up the debris in the laundry room, you're ready to reconnect your dryer. 7. Awesome! You're done! Keep in mind this task will probably need to be a part of your home maintenance on a regular basis. Once a year is not out of the question, though if you notice your dryer taking longer to dry clothes, it could be a sign that you need to clear the dryer vent again. Thanks for reading!
0 Comments
Your comment will be posted after it is approved.
Leave a Reply. |
AuthorCale Cameron Archives
May 2024
Categories |
Proudly powered by Weebly


 RSS Feed